| Danish | Dutch | Filipino | Finnish | French | German | Italian | Norwegian | Polish | Portuguese | Spanish | Swedish |
This
page gives you the bare essential information to start using your
program. I recommend you print it out and keep it alongside you as you
use your program for the first time. A more comprehensive description
of the program features will be available soon.
Don't
speak English?
Before
starting I recommend that you download
your language file.
This
will make it easier to use Kintraks by showing your local
language on windows and
controls. All you need to do is to save the file "language.csv" to your
Documents:Kintraks
folder. Close and re-open Kintraks to see the results. You may open the
language file and
make improvements to the translation. Please send your new
version to support@kintraks.com
so I can make it available to everyone.
1.
Create a Database
Kintraks
is a database program. It consists of two parts -
The Program: This
is the part you see on your screen when you run Kintraks consisting of
forms, pages, lists and buttons. It allows you to add, remove and edit
your animal records. It uses the information you have entered to
produce many types of reports and displays. The program can be run from
any directory on your computer but it is best to copy
it to
your Applications folder (Mac) or Home folder or subfolder
(Linux).
Databases:
These are files which store your animal records. Kintraks doesn't come
with a database, it creates one for you when you first start the
program. When you open the program you will be connected to your
default database in your Home (Linux) or Documents (Mac)
directory. If there is no database the program will ask you to create
one and automatically ask you to fill in some settings.
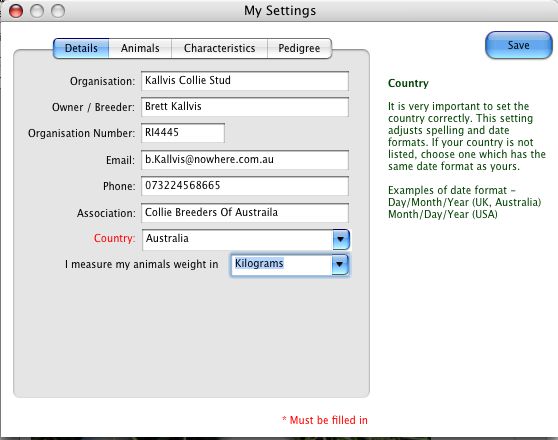
2. Enter User Settings
When you
create a database the
program needs to know some details such as the type of animal, your
details and particular names given to the male or female of the
species. These details are stored in the database file and used
throughout the program. You can edit these details at any time by
clicking the Settings
button.
The more settings you can enter the more useful the program can be. As
you move your mouse over each of the boxes some information will
display which will help you to fill it in. Not all details are needed
but you must at least enter details in the Country and Animal Type
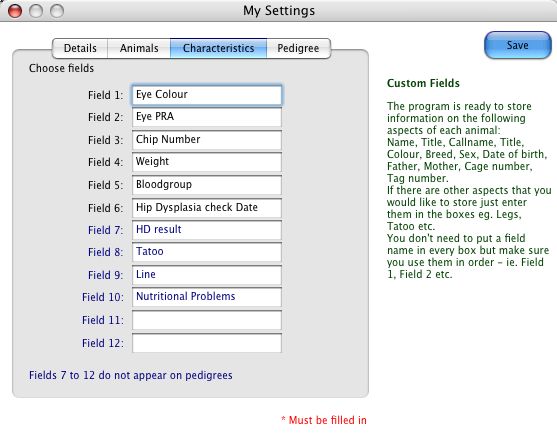
fields. On
the Characteristics tab there are boxes for custom fields. This is
useful for storing other aspects of your particular animal type eg. A
breeder may want to store whether an animal has a particular
trait, marking or inherited disease.
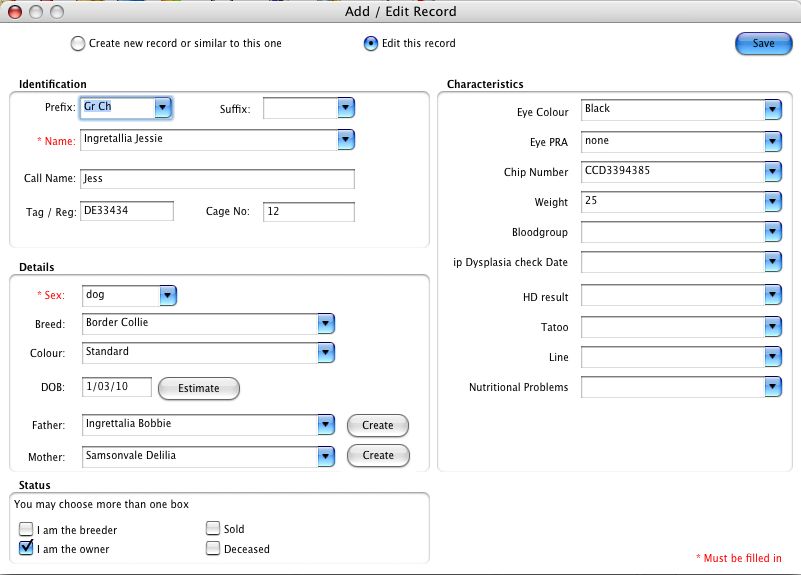
3. Add Records
No doubt you will be keen to
add records so once you have entered and saved your settings click the Add
button. A form will appear that allows you to fill in all sorts of
details about one of your animals. It is easier if you add your older
animal's first. You may not want to store all the information in the
boxes but you must give the animal a name and nominate the sex before
you can save the record.
You can also link your animal to it's parent's records if they already
exist (that's why oldest animals first is easier). Don't despair if
they aren't on the list. Use the Create
buttons to make them instantly so they can be part of the current
record. Kintraks uses the links you have made with parents to produce
family trees by looking up the parent name of each generation. No
family tree is stored it is simply created in an instant from your
information using the linking process. It is important to fill in the Status
section to enable the program to filter searches.
4.
Search
So you've been frantically creating
records. Where are they? Click the Search
button or move your mouse to the right hand edge of the screen to open
the Search panel. By default the list displays records where Ownership
is My [Animal Type]
eg. "My Dogs". You may not see all your records in this list but there
is a reason for this.
My [Animal Type]
excludes animals which are deceased, sold and you are not the owner.
Click Ownership is All
Records to see every record in the database.
Why default to My [Animal Type]?
It's just simpler to have an instant list of your current animals to
work with. It also means you can create or import records off other
breeders and store them alongside your records without them making it
hard to find your regular animals. The Search function can do a lot
more to create many lists of animals based on all sorts of
characteristics but you'll learn more on that by trying it for yourself.
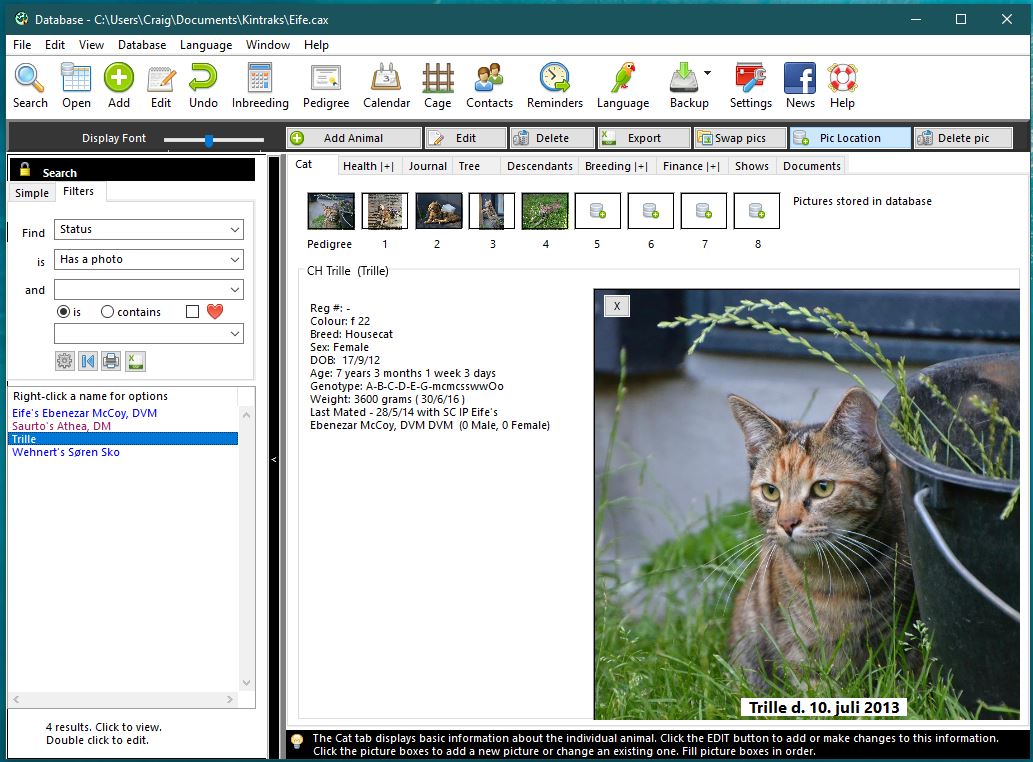
5.
Display
OK we have found an animal on the search list and now we want to look
at the details. Click once on the name to highlight it. You will notice
some information displayed on the pages behind the search list. By
clicking on the pin at the top of the search list you can automatically
hide or show it whenever you move your mouse across the magnifying
glass icon. You can close the search panel by clicking the cross in the
top right hand corner. To view search results again click the Search
button on the program toolbar.
There are eight tabs displaying various aspects of the current animal
(the one you clicked on in the search list). If you select a new animal
from the list the tab stays open but the information automatically
changes. Each tab is like a little program on it's own.
The first tab displays
the details you entered when you created your records. The others don't
tell us much at this stage but we can add more details by clicking on
the tab and clicking the button with the green plus "+" sign.
Some
tabs can display a form for you to type in more information or choose a
picture. Other such as Descendants, Inbreeding and Family tree are used
to calculate or display information.
The Calendar (click the Calendar tab) reminds you when some of the
appointments, reminders and breeding and health events entered are due.
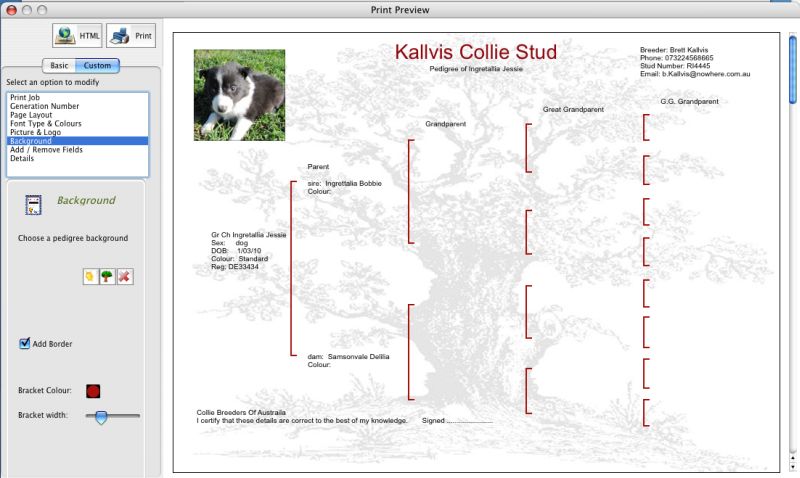
6. Print
Kintraks can produce pedigree certificates in paper and
electronic format. Click on your animal from the Search list. Once the
details are displayed click the Pedigree
button at the top of the program. A form will open which will allow you
to see how your pedigree will look. When you are happy with
the
result click the Print
button to produce a paper copy or click the htmlL button to produce a
pedigree to send by Email or to upload on the web.
That's the program basics. This basic guide will
be
replaced with a more comprehensive illustrated guide soon. Thankyou for
trying Kintraks.
If
you have any problems or feedback please don't hesitate to Email me for assistance..